HTB Write-Up | Easy Sherlock | Compromised
Introduction
This is a writeup for Hack The Box’s new Sherlock challenge, Compromised. This Sherlock is rated as Easy, so I’ll tailor this write-up to be beginner friendly and approachable. I’ll try to cover my methods thoroughly and explain the reasoning for each decision that I make.
For this demo I’m using Fedora 40 as my OS, but everything I do should be easy to repeat on any Linux-based OS
Starting Out
Let’s read the description and see what information we can glean.
“Our SOC team detected suspicious activity in Network Traffic, the machine has been compromised and company information that should not have been there has now been stolen – it’s up to you to figure out what has happened and what data has been taken.”
Big takeaways from the description
- Suspicious network traffic detected
- At least one machine has been compromised
- The compromised machine contained sensitive company data that was supposed to be better protected (presumably it was a breach of policy to have this data on the machine to begin with)
- The sensitive data was exfiltrated
Getting ahold of the data
Next, let’s take a look at the file that was provided with the challenge and see what we are working with.
Downloading compromised.zip and unzipping it
Here I used 7z to decompress the archive after the standard unzip command failed. I think that’s fairly standard across the Sherlock challenges. Other compression tools might work, but 7z is a popular and easy choice. Keep in mind that you’ll need to enter a password in order to decompress the archive. You can get the password on HTB as shown in the image below.

Decompress the archive as shown and take a look at what’s inside.
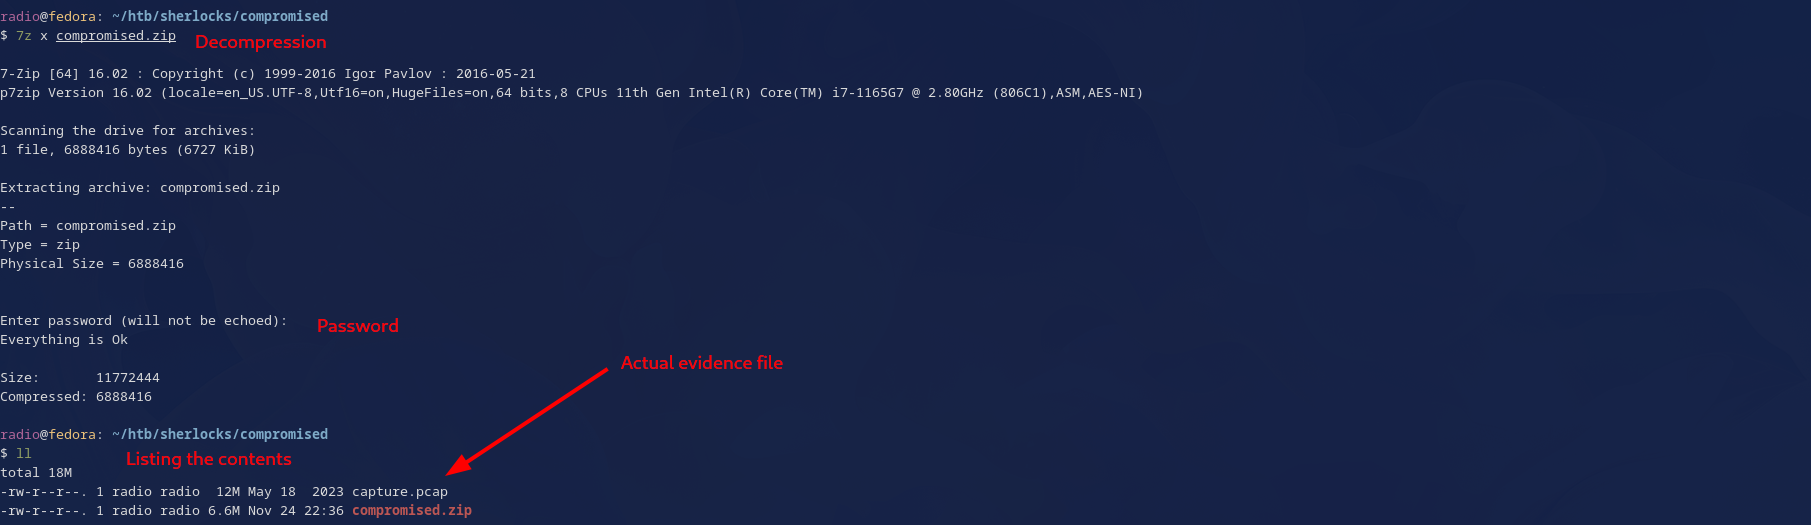
The file inside is capture.pcap. Files with the extension .pcap are packet captures, containing the raw packets sent over a network. There are many tools built for analyzing packet captures, but today we will use one of the most popular–-Wireshark. Now that we know what evidence we are working with, let’s dive into Task 1.
Task 1: What is the IP address used for initial access?
Okay, we are required to find out what is the malicious IP used by the attackers for initial access to the compromised machine. Let’s start with assessing all the IPs that are included in capture.pcap. Open it in Wireshark.

And then take a look at statistics > conversations
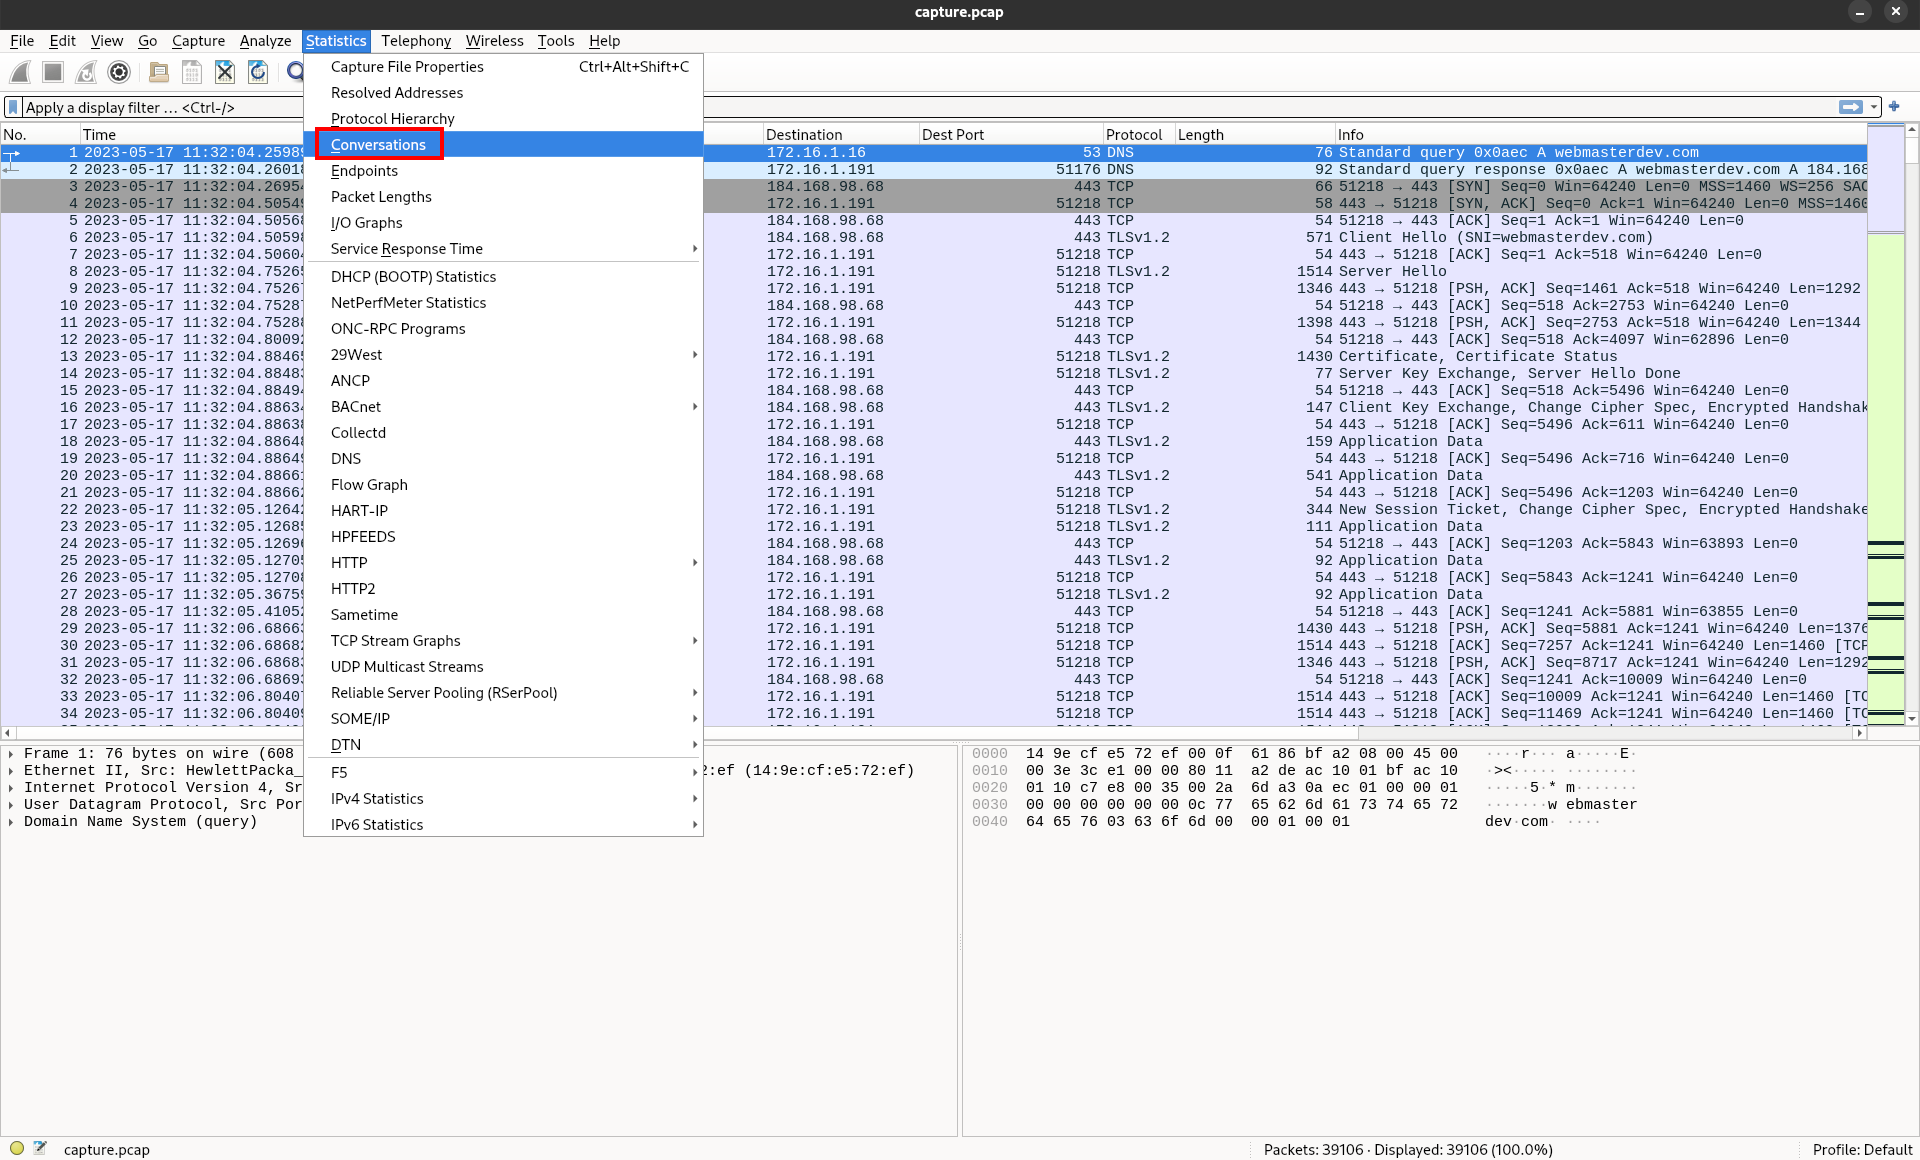
This is a handy feature of Wireshark that summarizes all the conversations (i.e. unique combinations of source and destination IP address) that exist in a pcap.
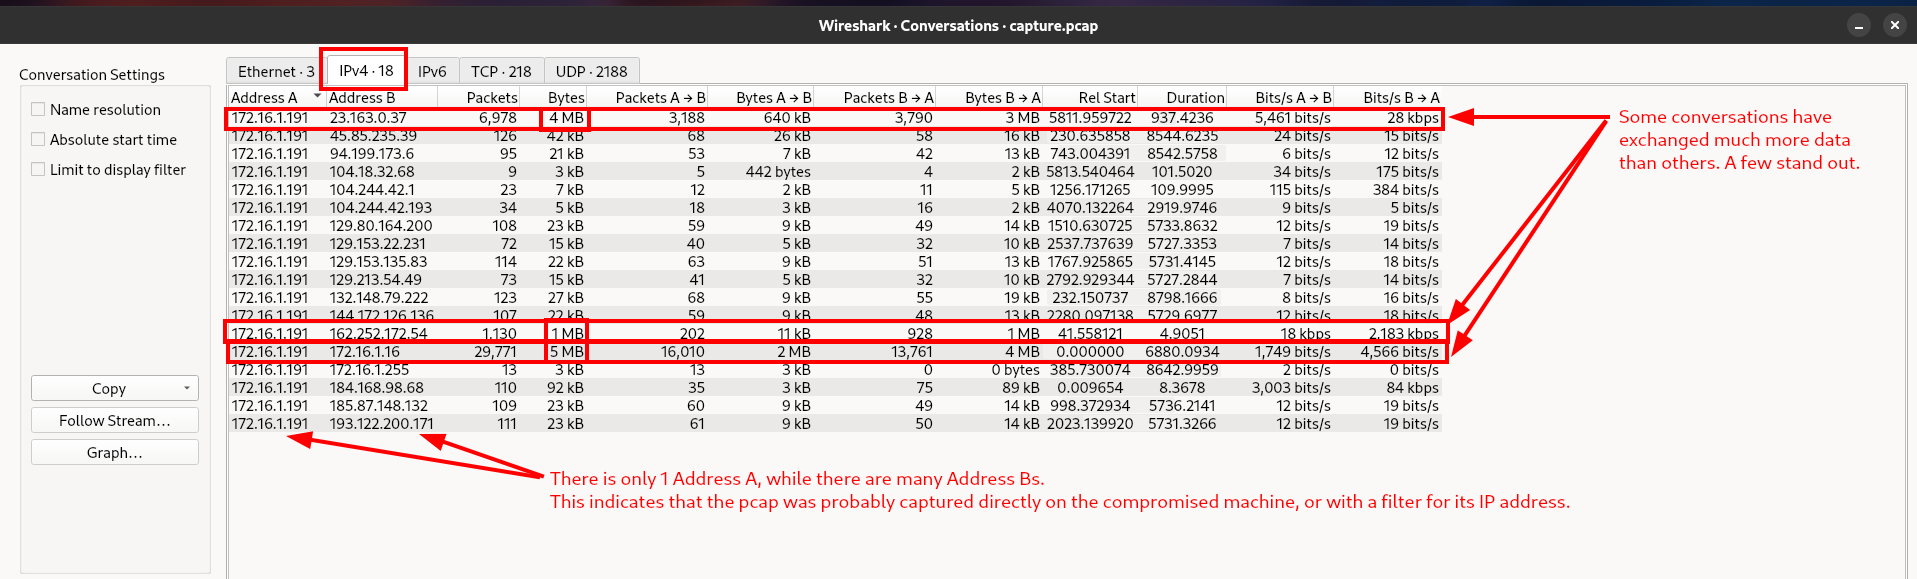
The conversations analysis shows that some IP addresses have exchanged significantly more data than others. While this is interesting, and should be noted for later, it doesn’t let us know exactly which IP was used for initial access. Let’s try something else.
The outlying data transfers are large enough that it’s likely they could have transferred files over the network. Let’s check if any of those files were transferred without encryption and in a way that we can extract them. Wireshark allows us to export objects that were transferred in the pcap we are looking at. Use File > Export Objects > HTTP. I’m starting with HTTP just because that’s a common protocol and likely to give us results.

Looking at the exportable objects, we see that there are quite a few.

However, one stands out as being much larger than the others, as well as being categorized as an image. Let’s take a look at that and see what we can find out about it. Also, we can see the IP that the file came from, which could come in handy in case this turns out to be a malicious payload (spoiler: it’s going to be important). Click the save button and select a folder to save the file to. The file will be called 6ctf5JL with no extension.
Next, we’ll use the file command in the terminal as a starting point to investigate the file.

Here we can see that the file command reports that the downloaded file is a PE32 executable (DLL). This indicates that the file is a DLL, or a dynamic linked library. This type of file is commonly used to carry malware meant to infect Windows systems. Especially given the strange name and lack of extension, we should consider this a malicious file until proven otherwise. It’s probable that 6ctf5JL had to do with the initial access. Trying that IP address we associated with the file earlier, we can see that it is indeed the correct answer for task 1.
Task 2: What is the SHA256 hash of the malware?
Since we have already downloaded what appears to be a malicious file, let’s assume that’s the malware they are referring to. Simply hash it with the sha256sum command and enter the hash as the answer.

Task 3: What is the Family label of the malware?
Similar malware is often said to be in the same “family” and classified under a single family name. If this malware is well known, it’s probable that this type of information could be available on VirusTotal. Upload the file to virustotal.com or search the SHA256 and take a look at the results.
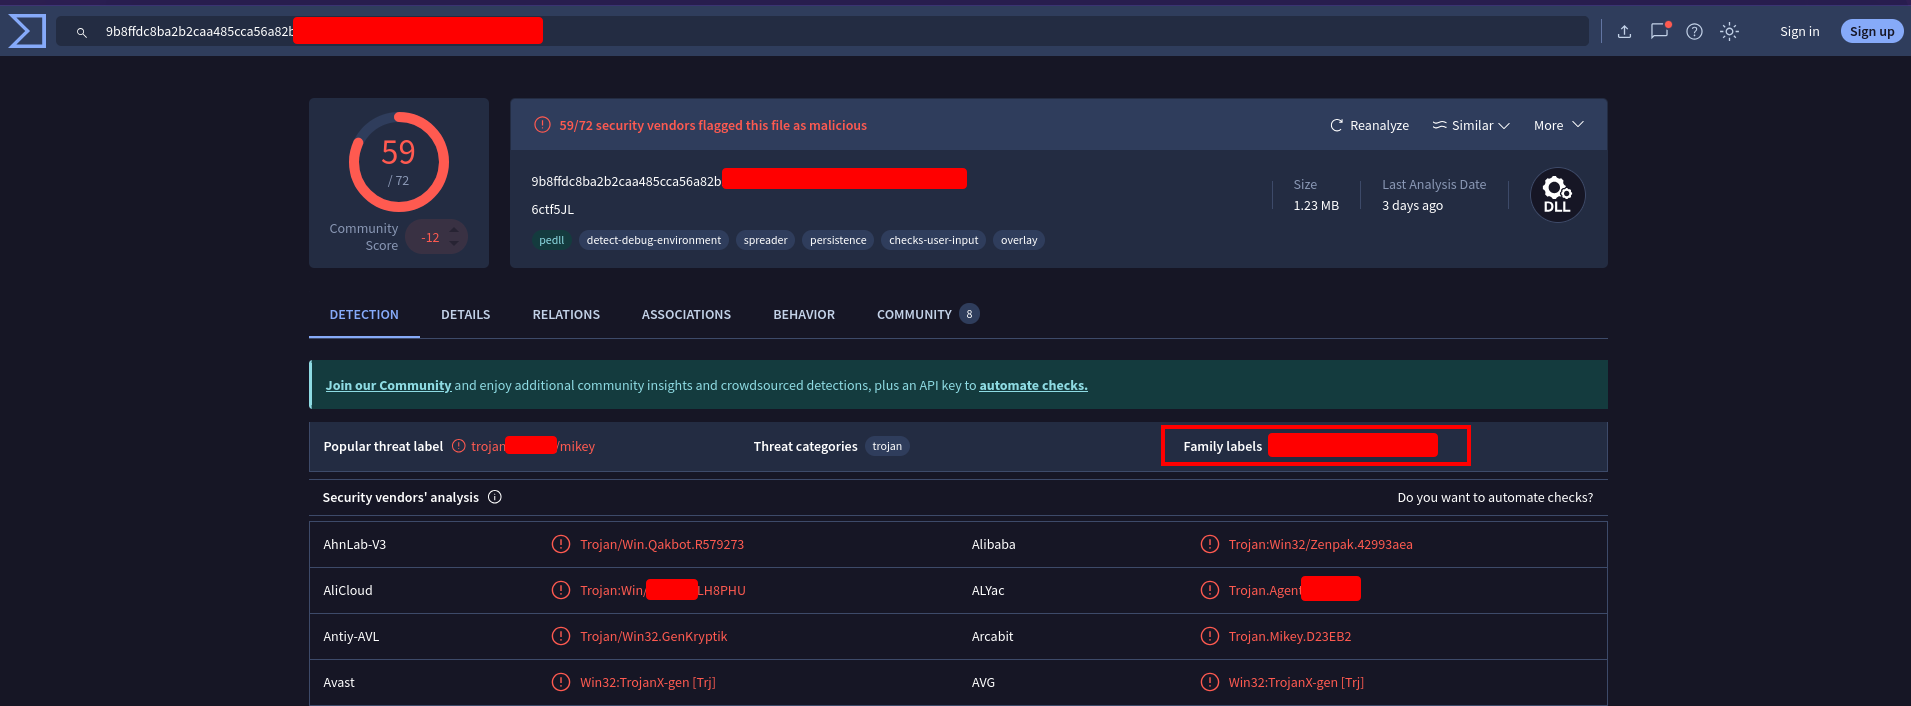
There are a few family labels, one of which is the answer to this question. You can also get to the same result by just Googling the SHA256 hash (though the answer is less obvious with that method).
Task 4: When was the malware first seen in the wild (UTC)
This sounds like another job for VirusTotal. Poke around in the information you can find about the malware on VirusTotal and you should be able to find the answer.
Task 5: The malware used HTTPS traffic with a self-signed certificate. What are the ports, from smallest to largest?
For this, we’ll need to head back to Wireshark. To isolate HTTPS traffic in wireshark, we need to apply a filter in the filter bar. Specifically, we need to filter for TLS traffic. Type tls in the filter bar, and press enter.
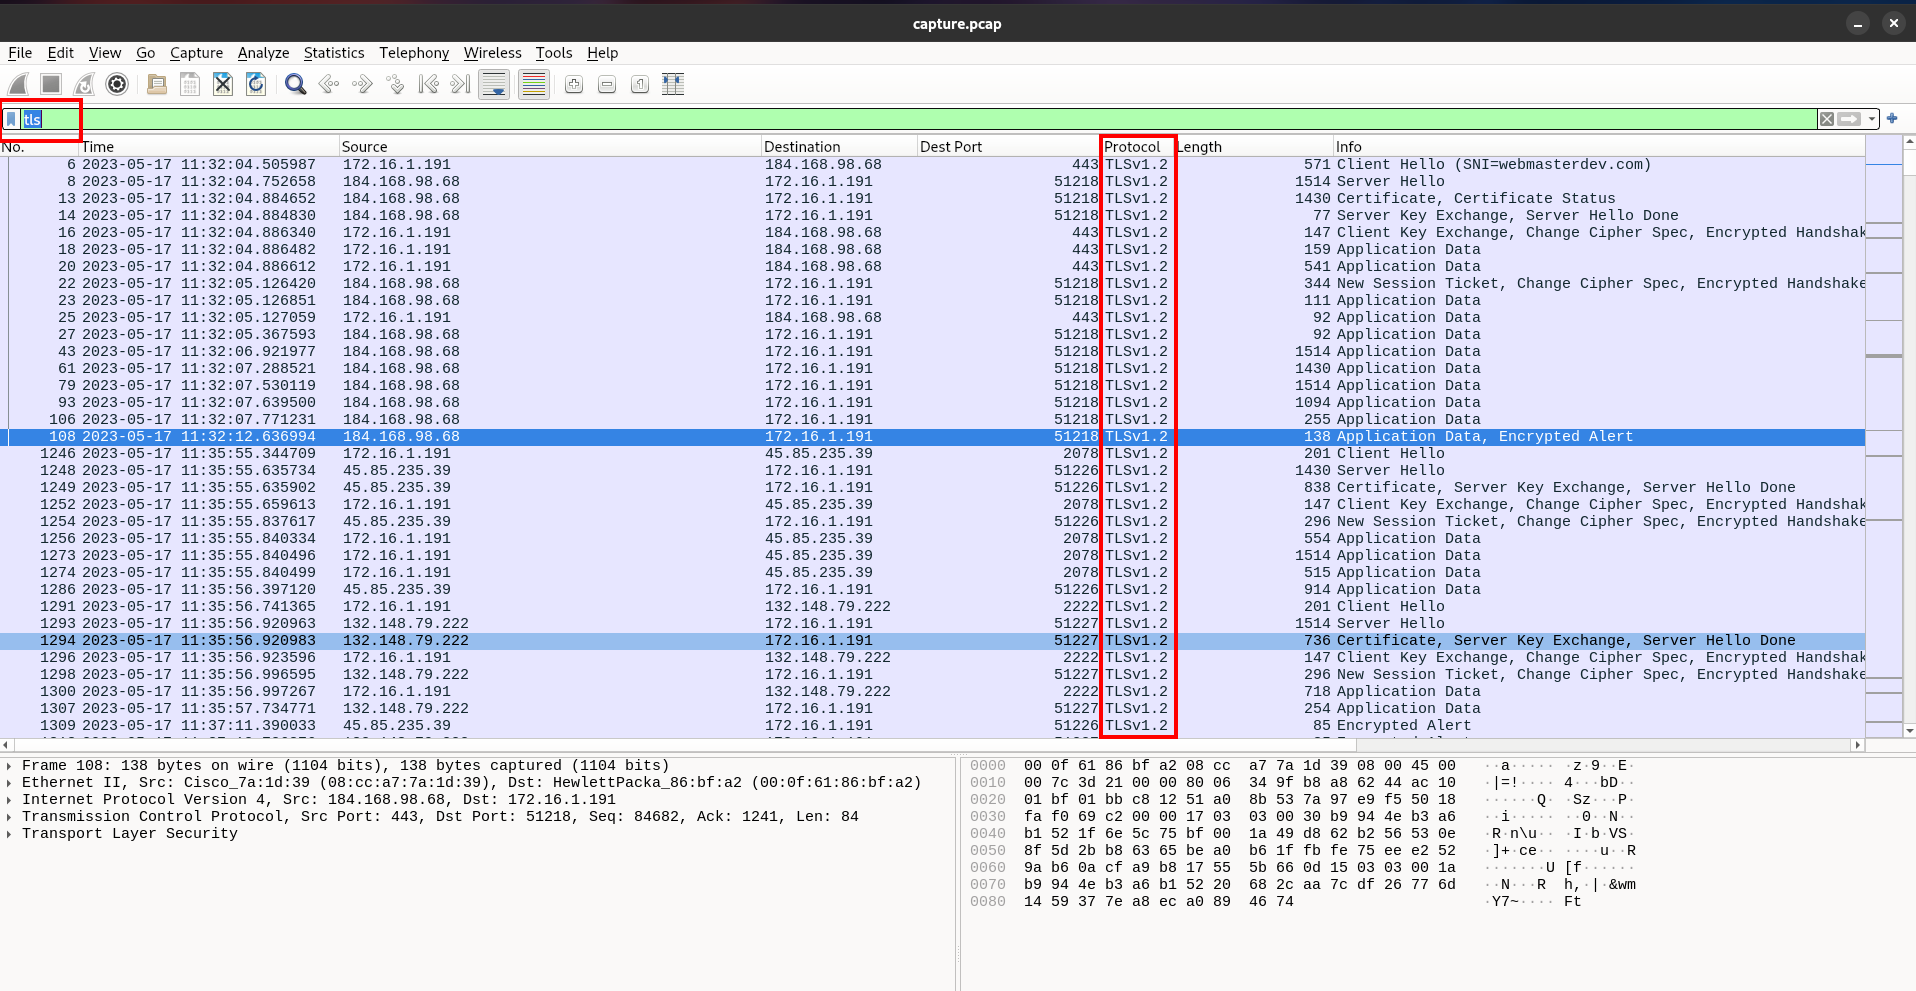
We can see that this filter returns only packets using the TLS protocol. TLS stands for Transport Layer Security and is the protocol that secures and encrypts HTTPS traffic. Typically an HTTPS server uses port 443, but in the conversations above, we can see that a few non-standard ports are being used. If we select a packet that contains “Certificate, Server Key Exchange, Server Hello Done” in the Info field and expand the TLS information included in the packet (shown below; lower left of the image), we can get some more information about whether or not this is one of the self-signed HTTPS certificates mentioned in the question.

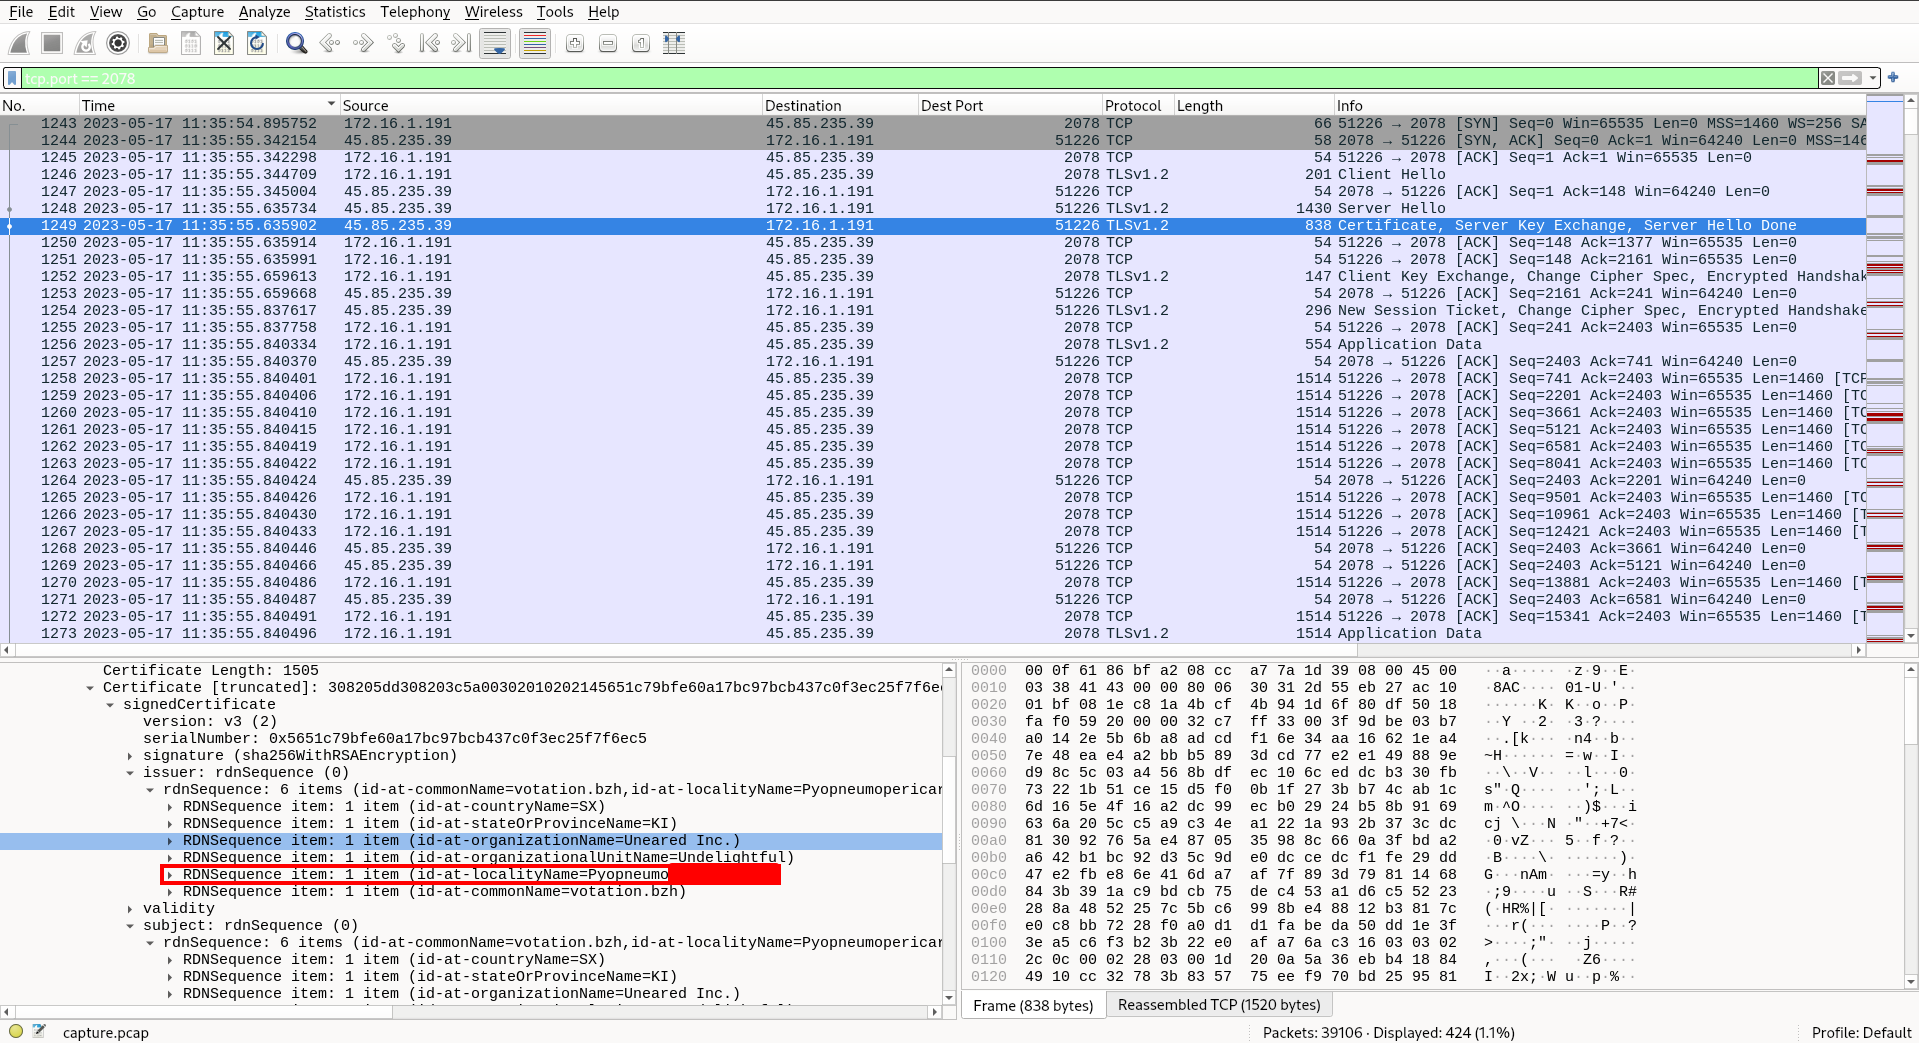
A certificate is self-signed when the issuer is the same as the subject. As we can tell from examining the certificate information, each piece of information about the issuer of this certificate matches the corresponding piece of information about the subject, meaning that this certificate is indeed self-signed.
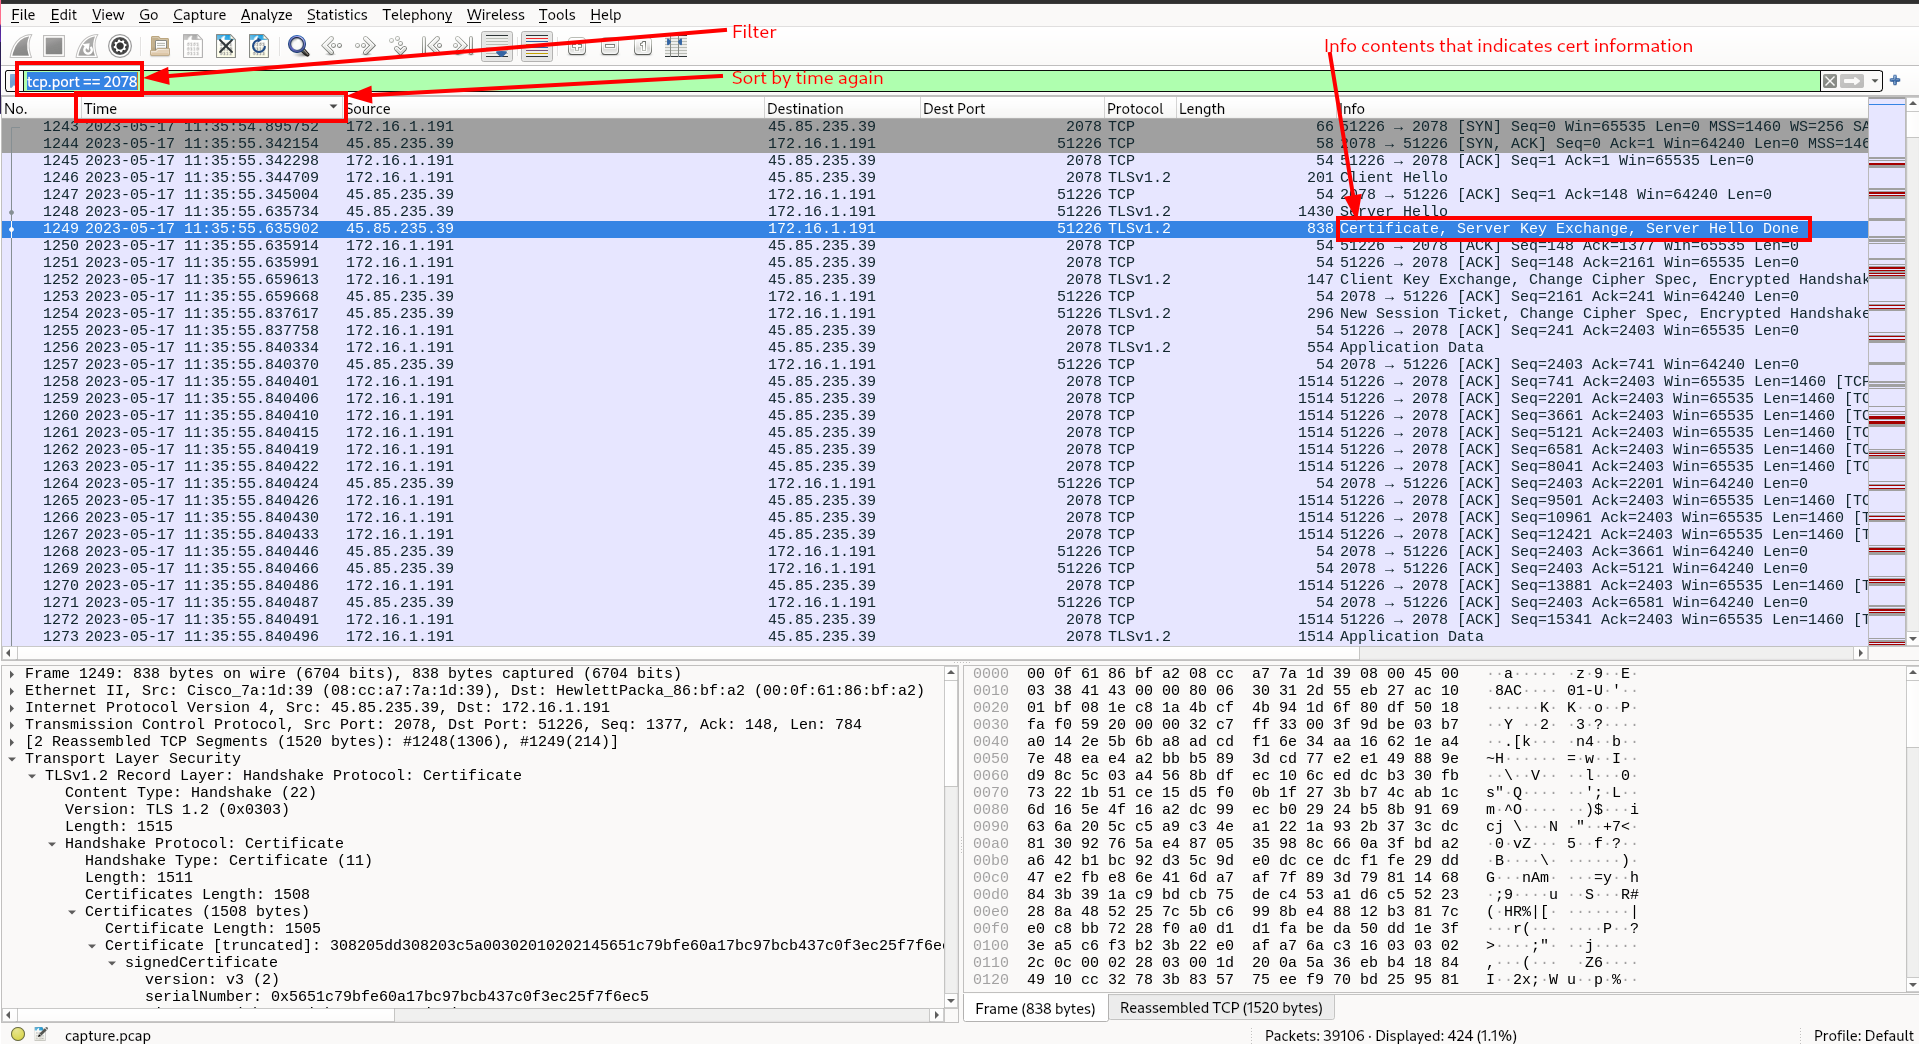
So, we know that one of the ports we are looking for is 2078, but there are two more. You can find them using a similar method to the one we have just reviewed.
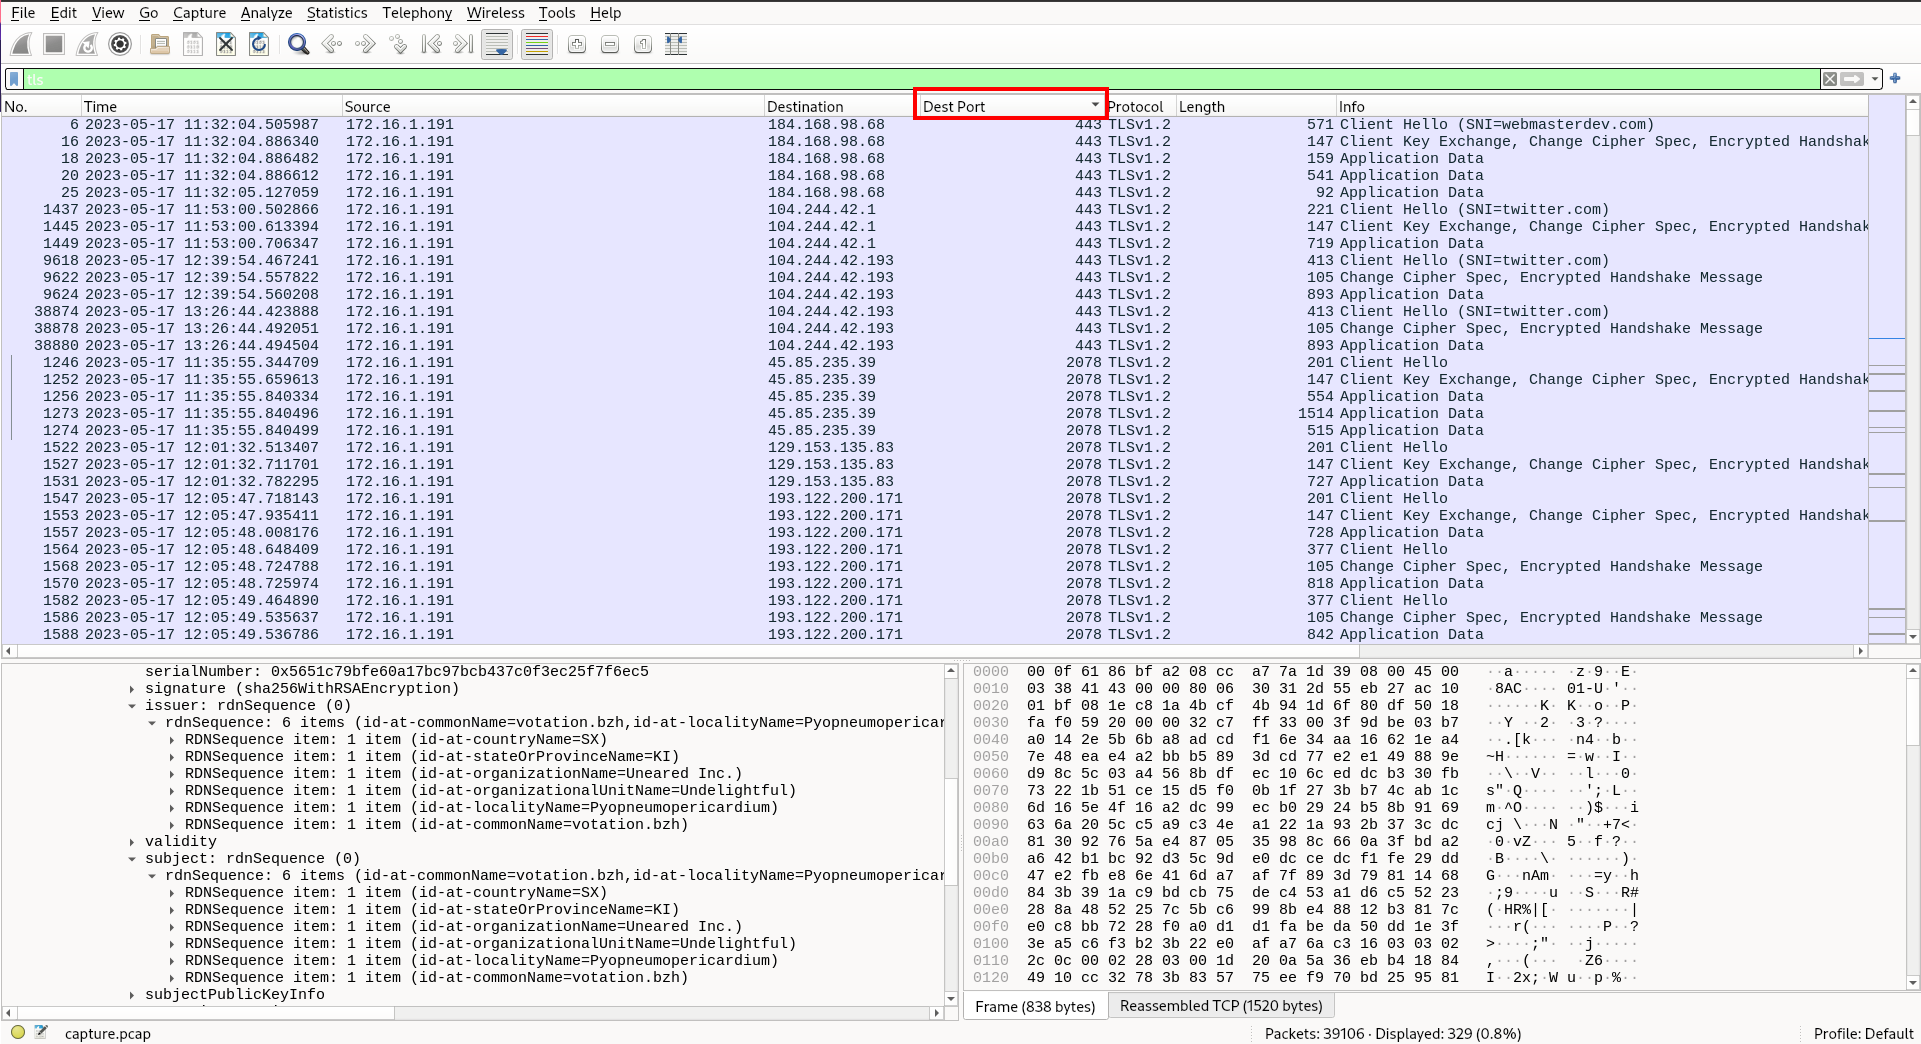
If you’re having trouble finding other ports being used with self-signed certificates, try sorting the packets by destination port to identify suspicious ports, then filter by that port in the filter bar to isolate the conversation and identify the packet containing the certificate information.
Then filter:
Task 6: What is the id-at-localityName of the self-signed certificate associated with the first malicious IP?
id-at-localityName is a piece of information contained in the certificate. So, selecting the same packet that we did for the last question, we can examine the cert information to find id-at-localityName.
Task 7: What is the notBefore time(UTC) for this self-signed certificate?
Again, this information can be found by examining the certificate information. This time, it is under the validity information. If you’ve come this far, it should be quite easy to find.
Task 8: What was the domain used for tunneling?
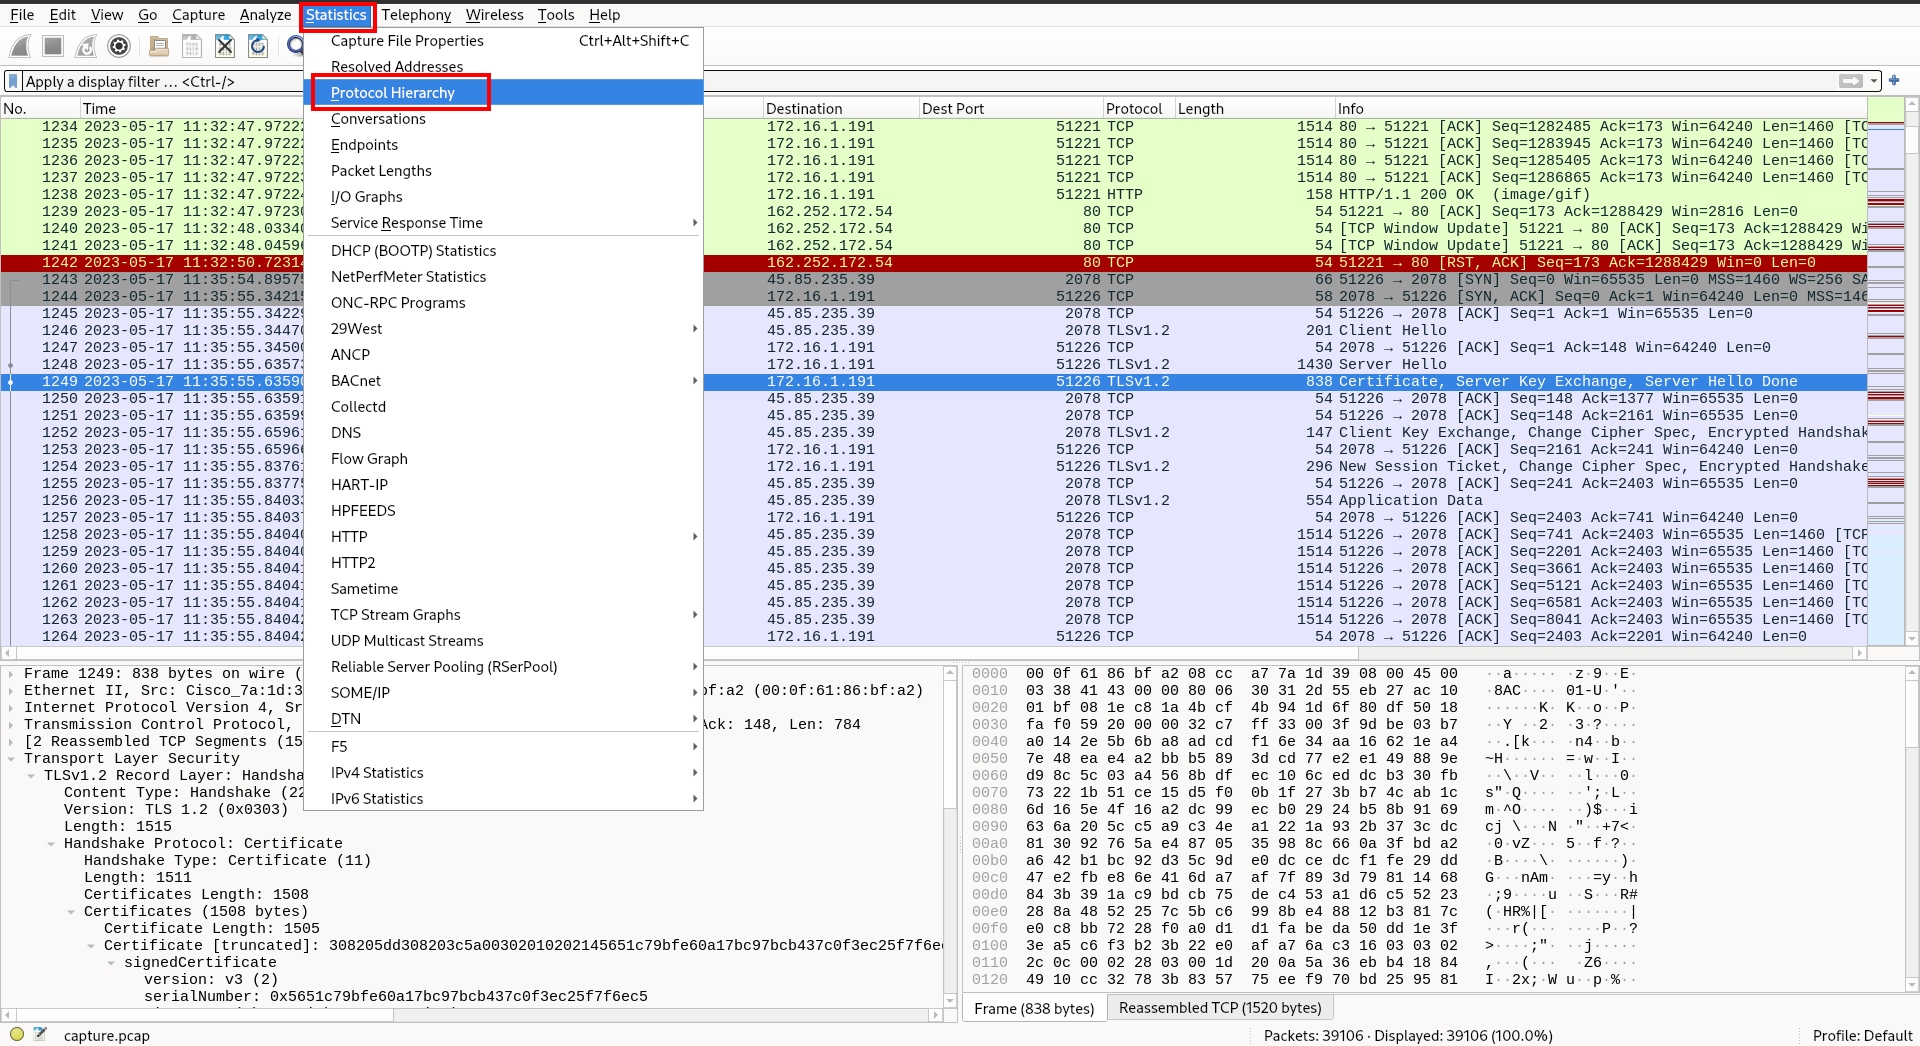
Tunneling is a technique that attackers use to send information over protocols that are commonly used but not usually used to send large amounts of data. To get an idea of what to look for, we should get a high level view of what protocols were used in this pcap. Luckily, Wireshark has just the tool for this job. As we did at the beginning of this Sherlock, we’ll be using Wireshark’s Statistics menu again. This time, select Statistics > Protocol Hierarchy (make sure to clear other filters you may have applied before doing this).
Immediately one of the protocols stands out.

DNS accounts for 76% of the packets and 37% of the bytes sent in this pcap. That is very abnormal as DNS is meant to resolve domain names, not transfer data. However, since DNS is whitelisted in almost every network, it is a popular choice for tunneling. It is likely the tunneling occurred over dns, but what domain was used for the tunneling? To find out, let’s apply a filter for ‘dns’ and check out the results.
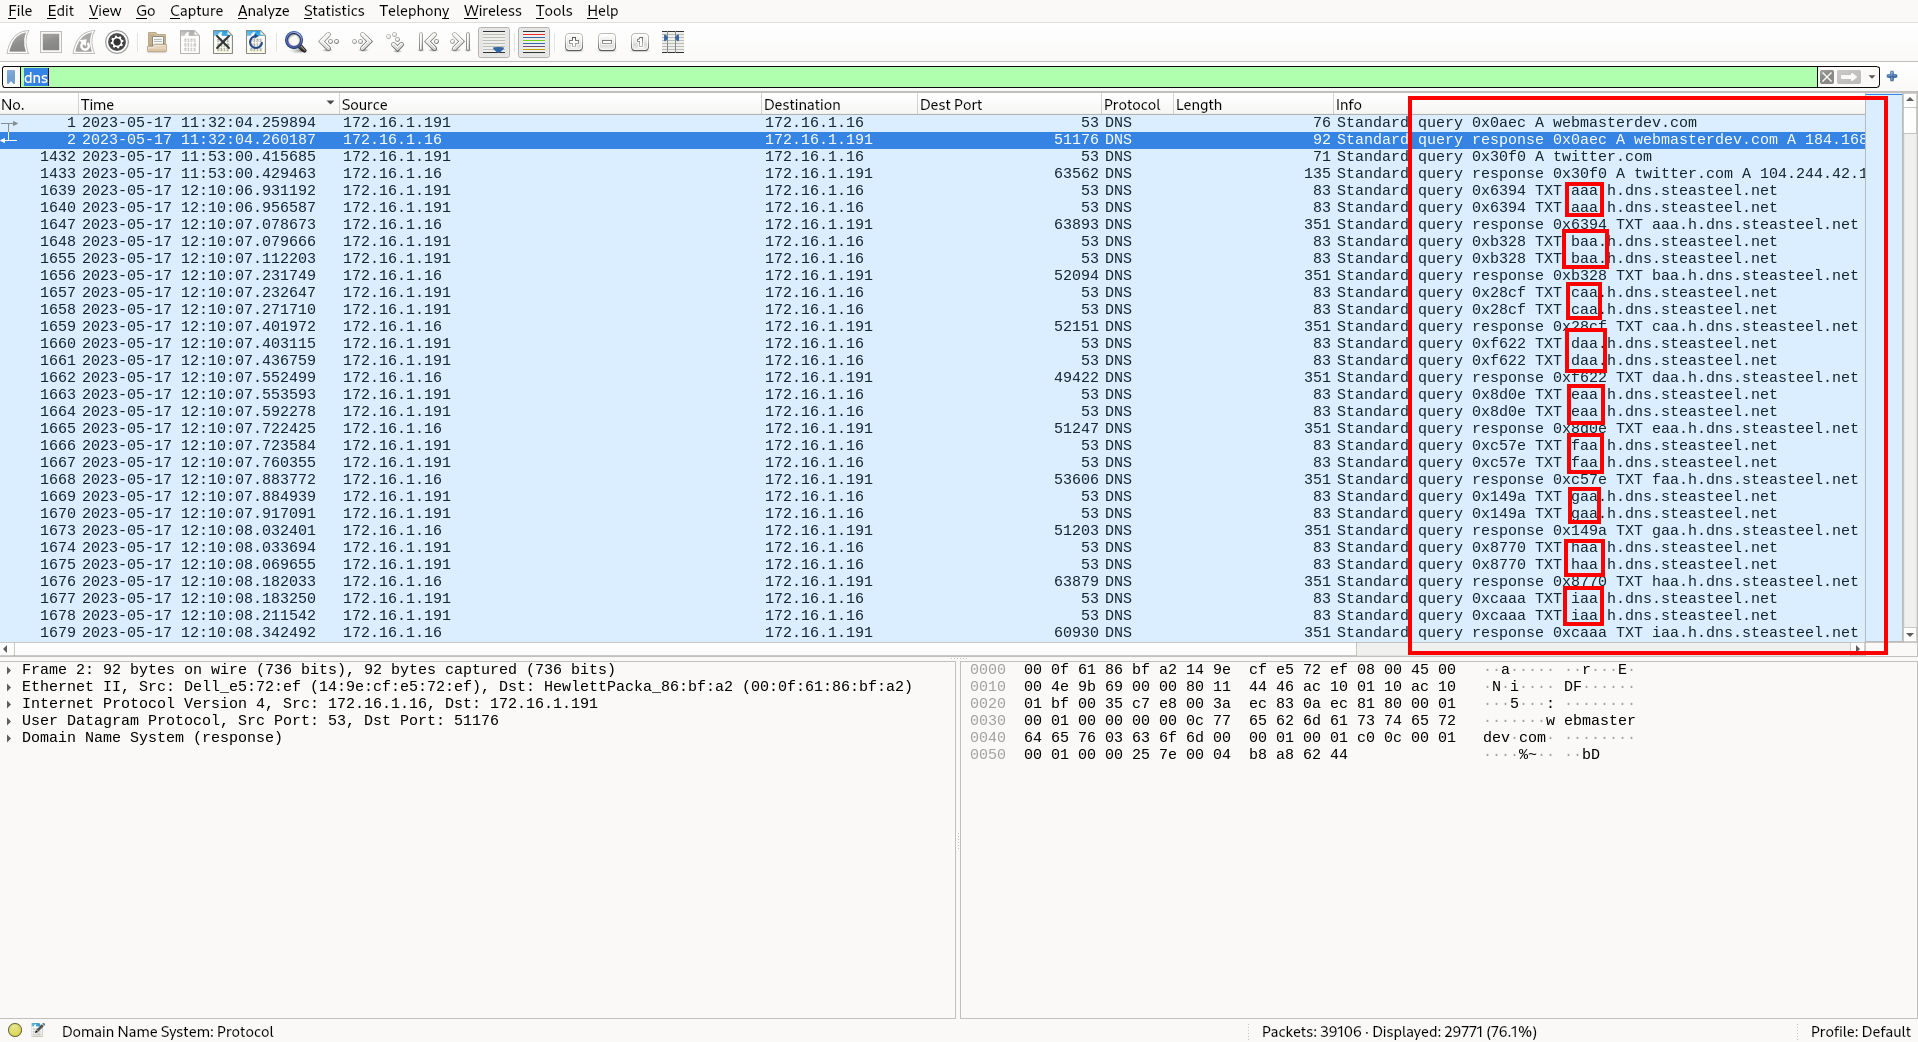
What we see in the screenshot above is repeated DNS queries for the same TLD (top level domain), but to different subdomains. The exfiltrated data is split up and encoded as these subdomain queries. The data will then be reassembled on the other side by the attackers. This is another indicator of DNS tunneling, so we can be pretty confident that the TLD that these queries are for is the one they are looking for in the answer.
Thanks for reading! If you have any questions or comments, feel free to reach out or follow me on X
Enjoy Reading This Article?
Here are some more articles you might like to read next: